Class Syllabus: Turnshoes
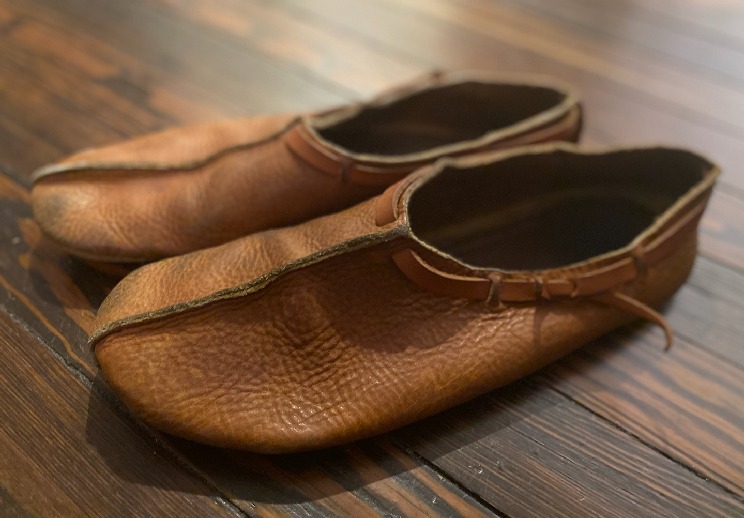
In this class you will make a pair of medieval turnshoes, measured and made to fit your feet and perfect for wearing in the house, around the yard, or in town.
I provide all tools and materials (listed in parentheses in each step below). I lead you through each step of the process, and provide one-on-one. While a fair amount of hand and wrist strength is needed to work with this leather, you don't need any previous experience.
Maximum class size is 8. Sessions are about 3 hours each. Attendance at all sessions and some homework are required to finish on time.
I'll be teaching the "Carolingian" pattern (above), but for the adventurous and crafty, most of the turnshoe designs you see on this site are fair game.
- Session 1
- Create a model of your feet (cardboard, duct tape, nylon stocking, sharpies, scissors)
- Session 2
- Convert the model to a paper pattern (kraft paper, scissors, xacto knife, ruler, hole punch, pens)
- Session 3
- Transfer pattern pieces to leather (paper pattern, pens)
- Cut leather for uppers (6 oz. chrometan leather, leather shears
- Cut leather for soles (9 oz. latigo leather, utility knife)
- Session 4
- Prepare uppers for sewing (skife, ruler, pen, strap punch)
- Stitch uppers (straight awl, needles, bonded polyester thread)
- Homework: finish sewing uppers
- Session 5
- Prepare soles for sewing (file, stitch groover, plough, ruler, sharpie, curved awl)
- Session 6
- Stitch uppers to soles (barge cement, machine stitching needle, nyltex thread)
- Turn shoes rightside out.
- Session 7
- Hammer shoes into finished shape (hammer, anvil)
- Cut and install ankle strap (ruler, utility knife, 6 oz. chrometan leather)