Taking a duct-tape mold for custom fit shoes
- Gather materials. You will need:
-
-
copy paper
-
pen
-
pencil and eraser
-
cardboard ( a cut-up box works fine)
-
duct tape
-
thin sock(s) you can cut up. I buy cheap knee-high stockings from the
grocery or pharmacy.
-
sharpie
-
an assistant (optional, but recommended)
- Check that your feet are (roughly) the same size.
-
-
Lay two pieces of copy paper down on the floor and stand, barefoot, with
one foot on each piece. Have your assistant trace the outline of each
foot, holding the pen straight up and down.
-
Hold the two pieces of paper, with the drawn-on sides facing each other,
together against a bright window so you can see both tracings at the
same time. Line up the heels and toes as closely as possible.
-
If the two tracings are the same within about 1/4" of each other (in
length and width), you'll only need to make one pattern that can be
used for both shoes. This is true for most people, and makes
the rest of the process much easier. If one foot is slightly bigger,
remember which one it is -- we'll use that one for the remaining steps.
-
If one foot is much larger, repeat the remaining steps for each foot.
Also, stop at this point and let me know that's happening.
- Carefully trace the outline of your foot on cardboard.
-
-
Place the cardboard on the floor and stand on it, barefoot or in thin socks, with your feet
shoulder-width apart. Wiggle your toes and spread them out, get comfortable, neither leaning forward
nor backward.
-
Use a pen for this step. You'll be drawing over it, and maybe erasing, later. It's important not
to erase the tracing, or you'll have to start over!
-
Have your assistant trace around your foot again. First, with the pen straight up-and down like
last time, getting in between the toes as much as possible without moving them. Then have them trace
again, getting as far under the arch as possible.
-
Finally, draw some reference marks. Find the joint of your foot: this is the widest part of your
foot, and also the location where your toes bend when you lift them off the ground. Also find the
point where your heel meets the arch. Draw a line perpendicular to the tracing at either side of the
joint, and where the heel meets the arch.
-
Step off of the cardboard.
- Decide on the shape of the sole, and draw that into the
cardboard.
-
-
Use a pencil with a good eraser for this step, to make changes easier.
-
For a good fit, there should be some space at the front for your toes, and a snug fit
everywhere else. It's also important for the look and strength of the finished shoe that the shape
of the sole be as smoothly shaped as possible.
-
Draw a mark about 1/4" in front of your big toe in the tracing. This should make enough space for
your toes to not bump the front of the shoe.
-
Starting where the perpendicular mark at the inside of the joint meets the tracing, draw a smooth
line through the big toe mark and continuing to the tracing at the outside of the joint. As long as
the line goes through those three points and is a smooth curve, you can create any shape here that
you want.
-
The line from the outside of the joint to the front of the heel should be straight. Continue in a
smooth curve around the heel, staying close to the original tracing.
-
You now have two lines at your arch, the outer one drawn straight down, and the inner one inside your
arch. The higher your arches, the further the two lines will be from each other. Find where the
curve of the inner line is pulled in the most and draw a mark 1/8" away from the inner line toward
the outer line. Draw a smooth curve from the front of the heel, through that mark, and continuing to
the inside joint where you started.
-
Stop here and send me a picture of the cardboard. Wait for me to give you the goahead, or provide
suggestions, before continuing.
-
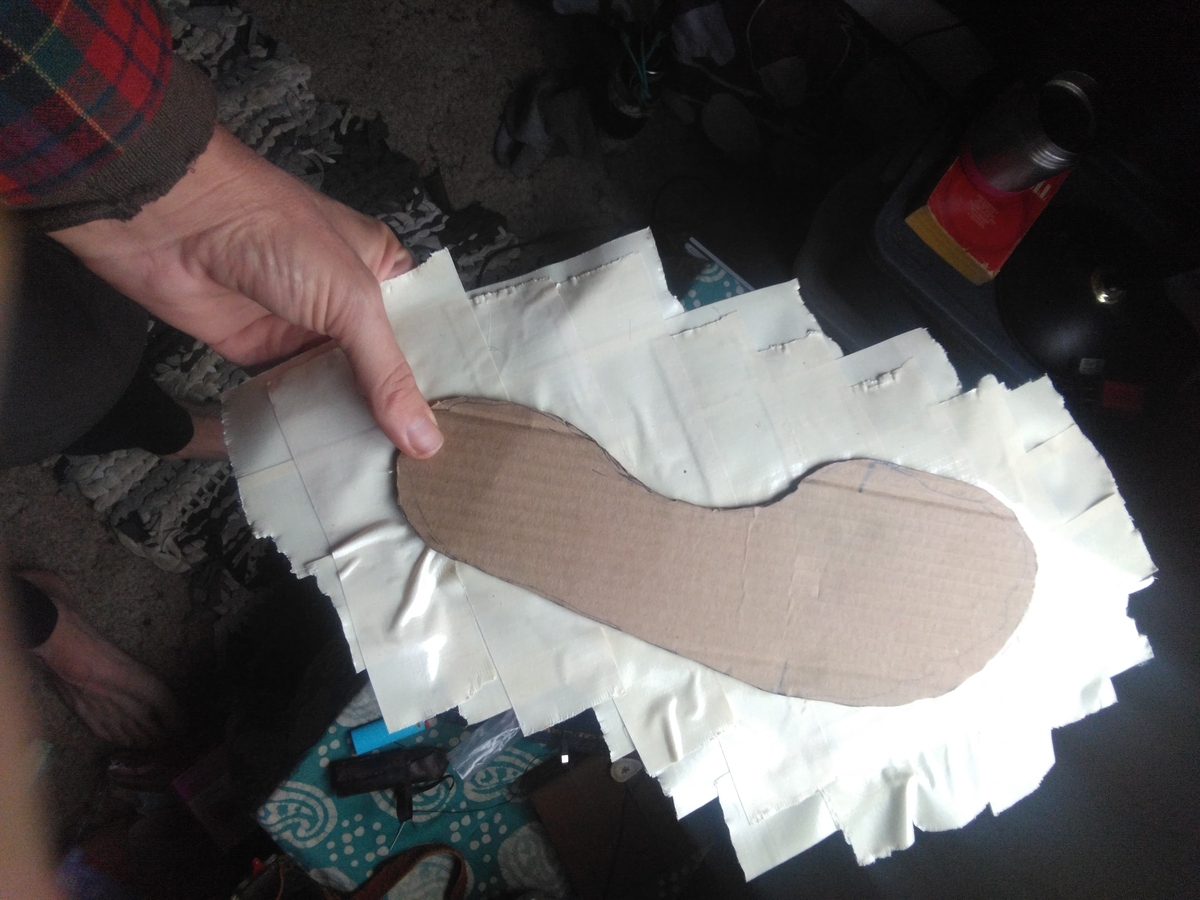
- Cut out the sole and tape it.
-
-
Using a utility knife with a sharp blade, cut the sole out of the cardboard, cutting along the
inside of the line.
-
Flip the cardboard sole upside down, so the side you traced on is facing down. Place the sole on a
flat smooth surface that you can put duct tape on -- a hardwood floor or tabletop is great.
-
Cover the entire sole, and at least 2" away from the sole in every direction, with duct tape. Overlap
the strips of duct tape about 1/4". Work carefully to keep the tape and joints smooth.
-
Do it again, running the second set of strips perpendicular to the first set.
-
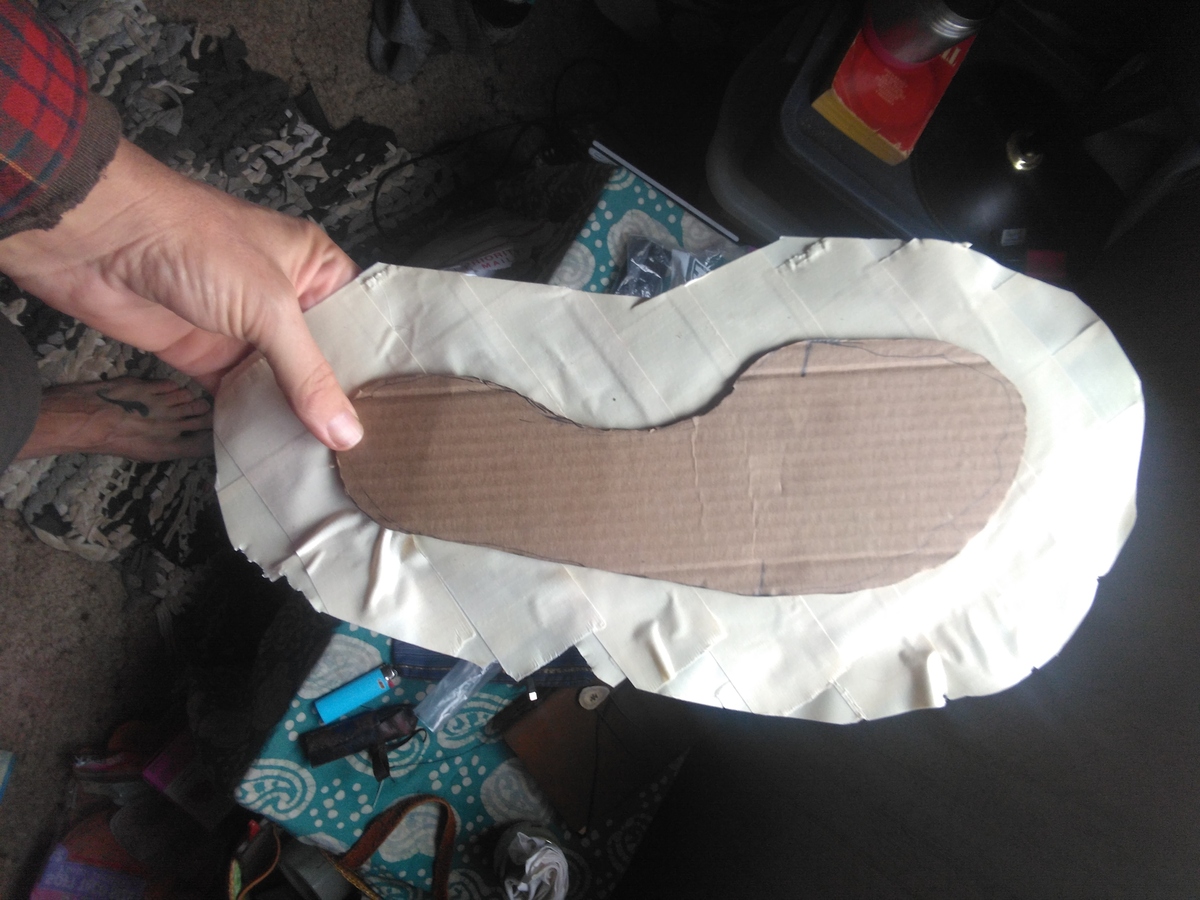
Peel the taped sole up off of the smooth surface.
-
Use scissors to trim the edges 2" away from the sole in a nice smooth line.
-
Make a series of cuts from the edge of the tape in toward the sole, perpendicular to the sole and
spaced about every 1/2" (measuring from the sole, not the edge). Be careful not to cut the sole!

- Tape your foot.
-
This is a very important step, and once you start, there are very limited opportunities to fix
mistakes. Read through the instructions before you begin and ask me if any part is unclear.
-
Find your assistant again.
-
Put a thin sock on your foot. I used knee-high stockings that I buy at the grocery store or
pharmacy for $2/box.
-
Place the taped sole on the floor with the cardboard and sticky side up. Carefully place your foot
back on the cardboard, and have your assistant use the original tracing to nudge your foot back into
it's original position.
-
Tear off a 24" strip of duct tape. Tear the strip again lengthwise, and either hold onto them or
stick them somewhere your assistant can easily reach.
Your job now is to HOLD STILL while your assistant does the following:
-
Fold each of the tape tabs up over your foot. Start at both sides of the joint and work toward the
toe. Pull the tabs moderately tight -- not so tight that you can see your individual toes through the
tape, but not floppy either. Make sure the tabs stick to each other (as much as possible. Continue
folding up the tabs around the back of your foot. pulling these tight.
-
Stick the half-strips of tape around the edge of your foot. The edge of the tape should be parallel
to the floor and almost touching it. Use one strip around the front of the foot, and the second
around the back. The two strips should overlap somewhat. Smooth the strips down over the tabs and
press them firmly in place.
-
Tape "sandal straps" over the foot, starting and ending each strip of tape at ground level. First
place a strip from the inside of the heel, across the instep, and back to the outside of the heel.
Then from inside of heel, across the achilles tendon, to the outside of the heel. Next, two strips
across the joint. Cut or tear the tape as close to the ground as possible (it's better to go a
little over than be too short), and pull the strips snug.
-
Tape the rest of the foot with two layers of tape. Pull tight at the back of the foot, leave some
wiggle room at the front. Get at least 1" above the ankle bones (or 1" higher than you want the
finished shoes to be). The tape should feel stiff over the entire area of the foot. Poke and
squeeze it, looking for thin spots and covering them up. Pay special attention to where the upper
meets the sole.
-
Lift the foot off the ground (it might be a bit stuck!) and carefully fold any loose edges over onto
the sole. The duct tape should feel snug but comfortable.
- Does what you've created look like a shoe? If so, continue to the
next step!
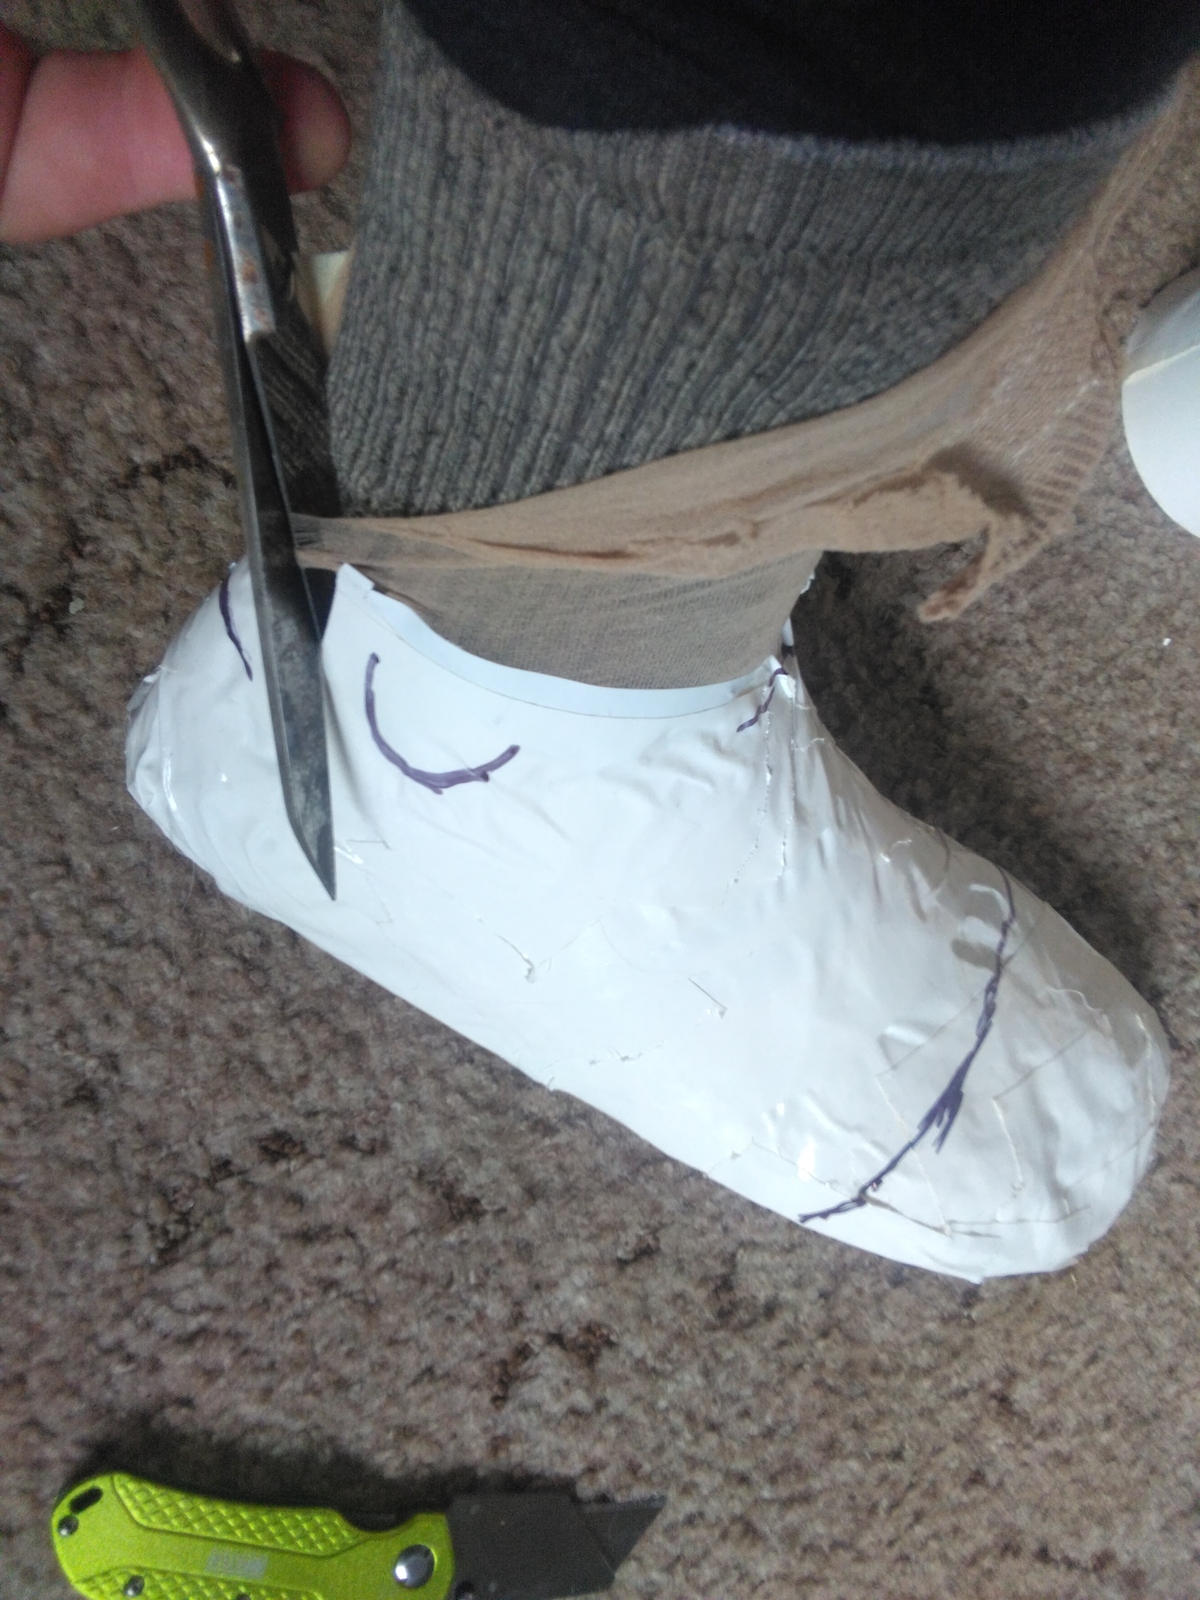
- >Make important marks on the tape with a Sharpie.
-
-
Circle the inside and outside ankle bones.
-
Mark a horizontal line at the back of the shoe where you want the top of the shoe to be.
-
Mark a horizontal line where the heel bone and the achilles tendon meet at the back of the foot.
This is call ed the "counter point"
-
Draw a line across the joint, from ground to ground.
-
Mark a line across the top of the instep, right where the ankle bends.
-
Place your thumb on the ground behind your heel, and the index finger of the same hand just in front
of the line at your instep. This is the widest part of your foot. Without changing the shape of
your hand, slide your thumb up to the mark you made at the counter point. sliding your index finger
forward along your instep. Draw a mark just behind your index finger.
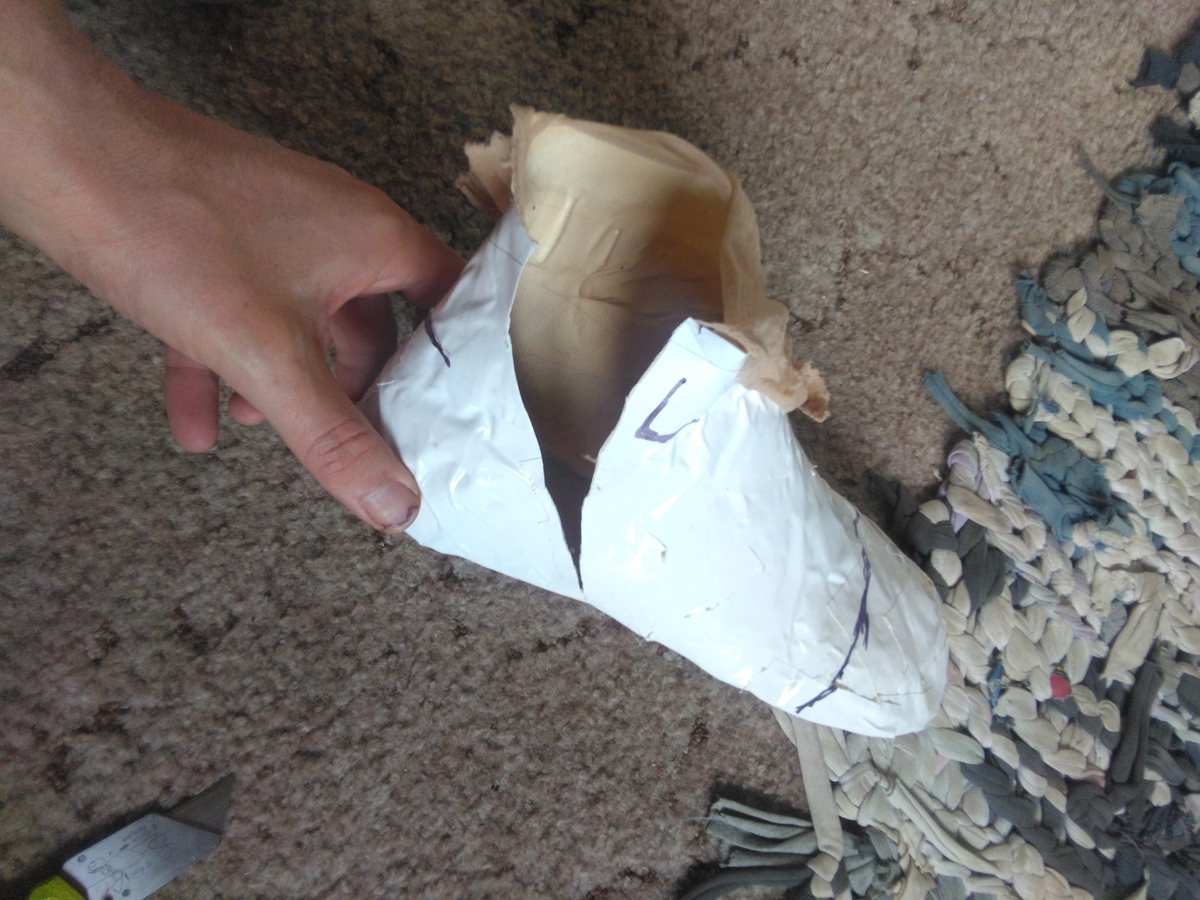
- Cut the mold off your foot.
-
-
With a sharp pair of scissors, cut down through the sock and the tape at the outside of your foot,
behind the ankle bone. When you've cut below the ankle bone, start cutting forward, aiming for the
ground at a 45 degree angle.
-
You should now be able to bend the sole down at the heel and remove your foot.
-
Carefully realign the two halves of the cut and tape them back together.
-
Gently stuff the mold with newspaper to help to hold it's shape during shipping.